Get a full-body stretch with these easy moves!
By Chelsea Morrow
Do you take the time to stretch?
When I ask people this question, the general response I get is that they aren’t flexible enough and it hurts to stretch.
I am not naturally flexible either. I know what it is like not to be able to touch my toes. But when I became a professional figure skater it was required of me to bend myself into crazy positions, from gliding across the ice in the splits to spinning with my leg yanked up over my head. So how did I go from extremely stiff to amazingly limber? I simply stretched!
Everyone is capable of becoming flexible—all it takes is time and practice. Do you avoid the gym because you think you aren’t strong enough? No! You understand that in order to become strong, you must lift weights. And that when you regularly hit the gym for an extended period of time, you notice yourself getting stronger. The same is true with flexibility. You won’t turn into a bendy gymnast overnight, but through developing a regular stretching routine, you will slowly begin to feel yourself become more limber.
Today I cannot imagine living my life without being flexible. It’s no longer a priority for my career, but it will always remain a priority in my life. I experience greater vitality in my day-to-day activities when I have taken the time to loosen up my body. I move more easily, feel stronger in my workouts, feel less sore afterward and reduce my chances of injury.
Give stretching a chance and feel better in your life! Get rid of your aches and pains, treat your body with respect, quiet your mind, and just allow yourself relax. You deserve it!
Try these five simple yoga poses that will give you a full-body stretch in less than ten minutes.
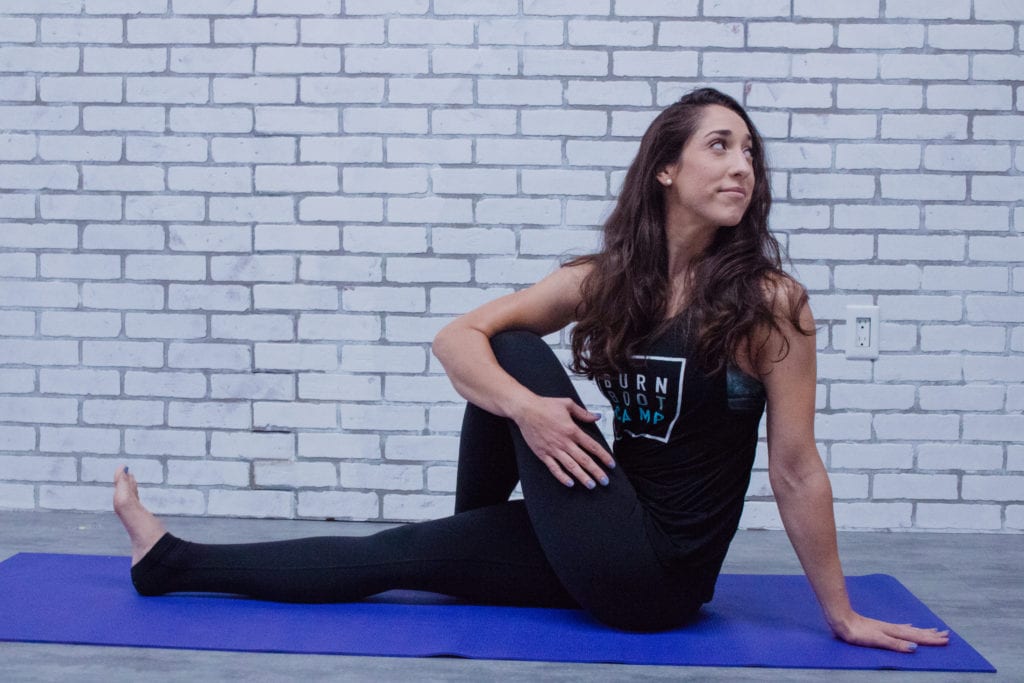
Seated Spinal Twist
Muscles stretched:
Oblique muscles, upper and lower back muscles, neck muscles, piriformis, glutes
How to:
Step 1
Sit on the floor with your left leg extended straight in front of you. Cross your right leg over top and plant your right foot firmly on the ground, as close to your left hip as possible. Make any needed adjustments to ensure both sit bones are equally placed on the floor. Sit up on a pillow or folded blanket to assist.
Step 2
Take a deep breath in as you hug your knee into your chest and extend your spine as long as possible. Ensure your shoulders are stacked directly over your tailbone, creating one straight line.
Step 3
Keep your left arm wrapped around your knee, your back completely straight and both sit bones glued to the floor as you make your way into the twist. On an exhale, twist to your right, gaze over your right shoulder and place your right hand behind your right glute. Avoid twisting from your lower back, as it does not have great range of motion. Ensure you are finding your twist from your navel up.
Step 4
With each inhale, try to make your back stand even taller; on each exhale, try to twist further. Protect your back by using your abdominal muscles to deepen the twist rather than the leverage of your left arm wrapped around your knee.
Step 5
Remain in the stretch for 45 seconds before switching sides.
Benefits:
- Helps alleviate menstrual discomfort, sciatica and backaches
- Promotes proper digestion
- Works to detoxify organs of built-up toxins
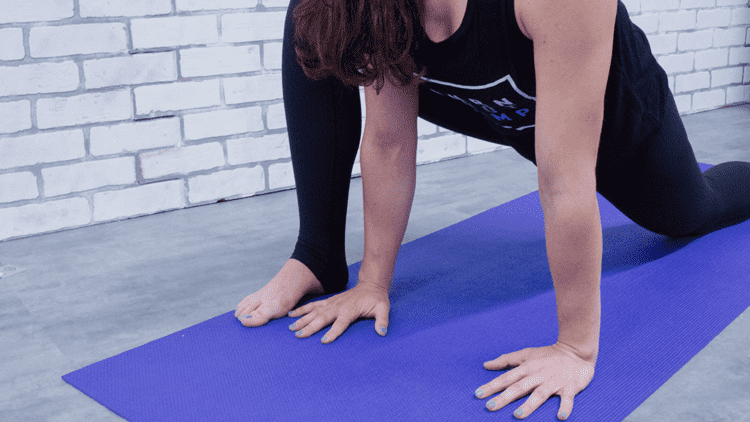
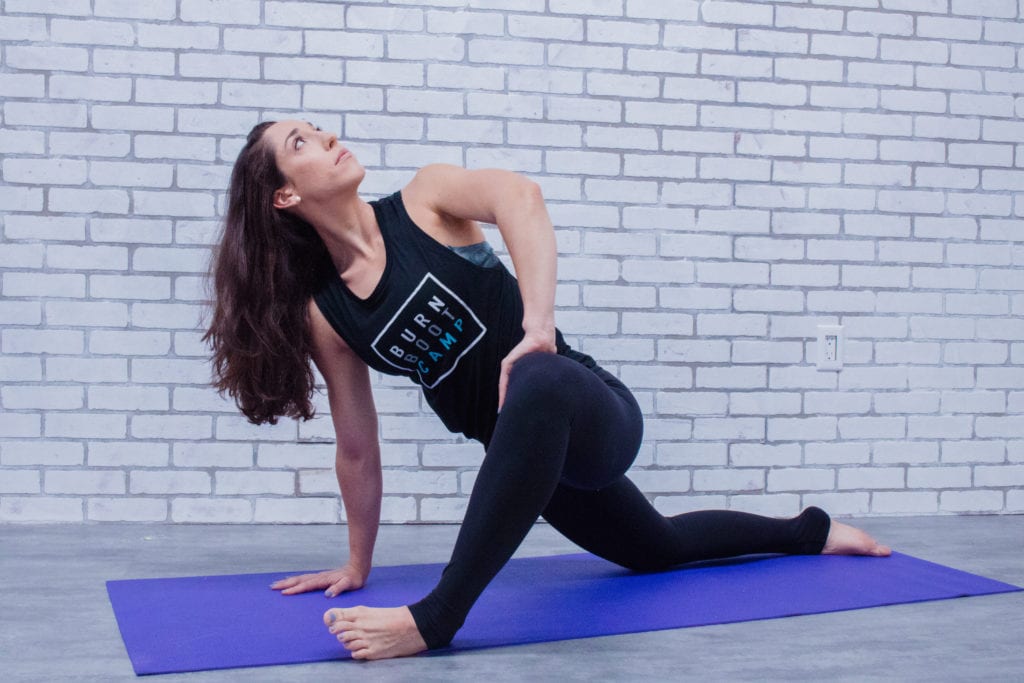
Lizard Pose
Muscles stretched:
Hip flexors, quadriceps, abductors, adductors
How to:
Step 1
Set up the pose by bending into your right knee as you take a long step back with your left foot and gently place your left knee on the floor. Avoid causing pain in your knee by taking a longer step backward and placing the top tip of your kneecap on the ground rather than your whole kneecap.
Step 2
Place your hands on either side of your right leg and ensure your shoulders are perfectly square to the front.
Step 3
Look down at your right knee and align it directly over your right ankle.
Step 4
Move your right foot out wide, just outside of your right arm. Roll onto the blade-edge side of your right foot and allow your right knee to drop open to deepen the adductor and abductor stretch.
Step 5
Sink both hips evenly toward the floor. Try to draw your right hip back into its socket as you draw your left hip forward, helping you deepen the hip flexor stretch.
Step 6
Carefully press your right hand against the inside of your right knee as you turn your upper body toward the right to encourage a greater opening in your hip.
Step 7
Hold for 45 seconds before switching sides.
Variations:
- Drop down to your elbows.
- Bend your back knee and draw your heel toward your glute. With your opposite hand, grab the inside of your back foot. Use opposite forces to increase the stretch through your quadricep by pressing your foot firmly away from your body as you use your hand to pull your foot in closer to your glutes. To intensify the stretch, keep your shoulders square to the front.
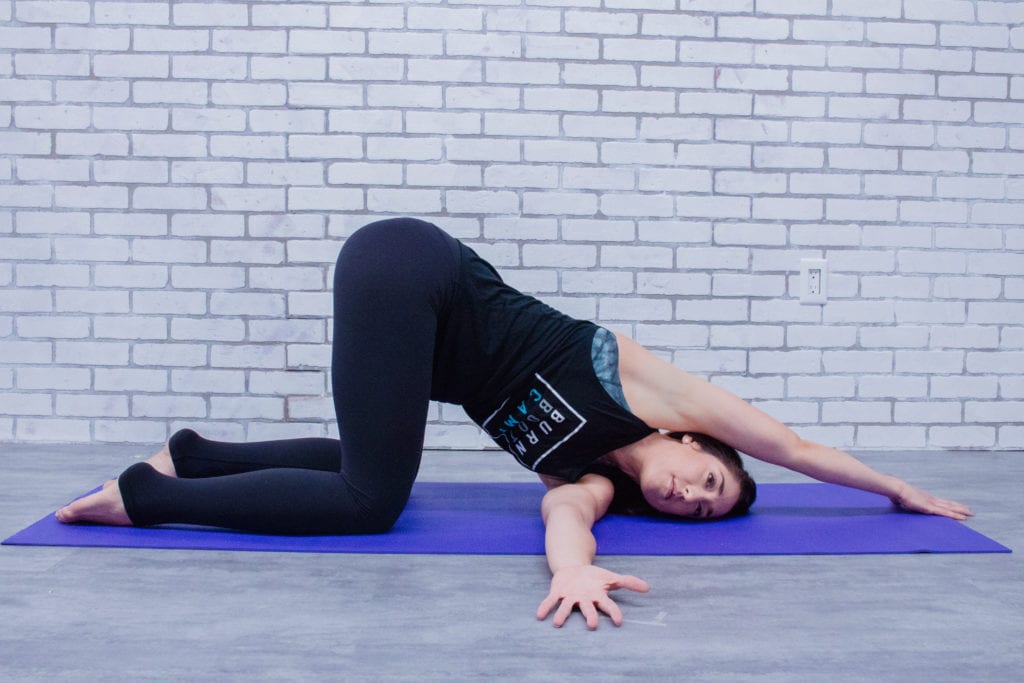
Thread the Needle
Muscles stretched:
Shoulder muscles, upper back muscles
How to:
Step 1
Begin in tabletop position, kneeling on all fours with your shoulders stacked directly over your wrists and your hips stacked directly over your knees.
Step 2
Reach your left arm up toward the ceiling as you open your upper body toward the left, creating as much length through the spine as possible.
Step 3
Come back through center and twist to the right as you thread your left arm behind the right. Ensure your shoulder, elbow and wrist are in one line, creating a 90-degree angle with your body. Keep your hips stacked directly over your knees and turn your gaze toward the right.
Step 4
Firmly press your fingertips into the ground above your head, using it as leverage to twist your body open further toward the right. Optional: Walk your fingertips further forward to feel a greater stretch through your upper back muscles.
Step 5
With each exhale, allow yourself to release more weight into the the shoulder being stretched. Hold for 45 seconds before switching sides.
Benefits:
- Helps release commonly held stress and tension in the upper back
- Reduces neck discomfort
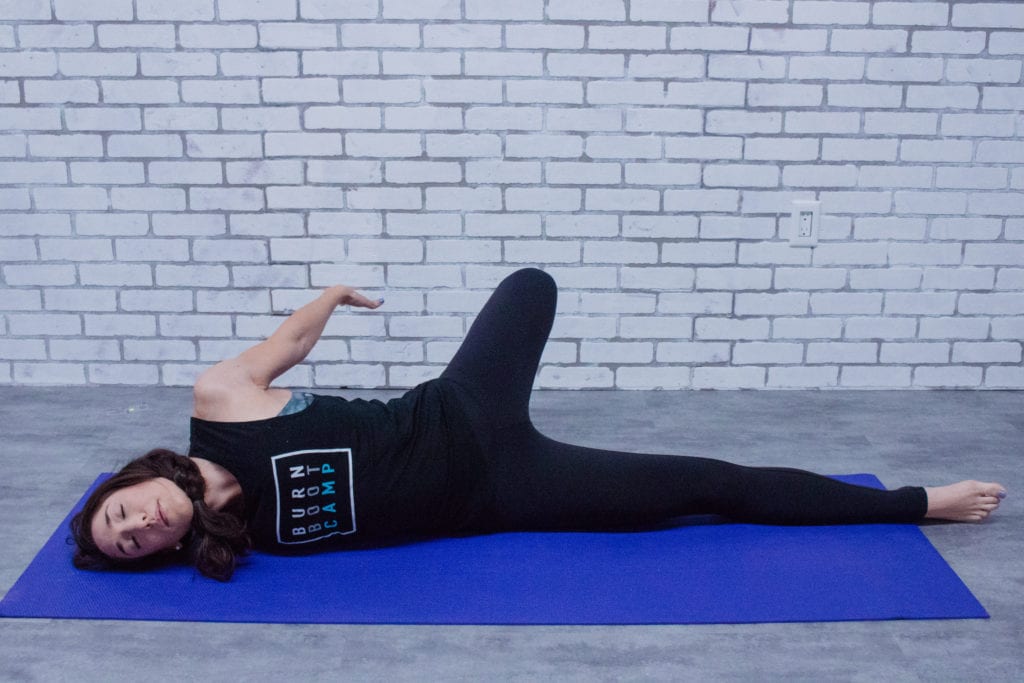
Lying Chest Opener
Muscles stretched:
Pectorals, shoulder muscles, rhomboids
How to:
Step 1
Begin lying flat on your stomach with your arms extended straight out to the sides, palms face-down and your head turned toward the right. Ensure your shoulders, elbows and wrists are in one straight line.
Step 2
Bend your left knee toward your left glute and slowly roll your body weight onto your right side, dropping your left foot onto the ground next to your right hip.
Step 3
Lift your left arm up off the ground, reaching your left hand toward your right, attempting to make a connection.
Step 4
Hold for 45 seconds before switching sides.
Variations:
- Bend your right elbow at a 90-degree angle to deepen the stretch through the pectoral muscles.
- Plant your right foot on the ground next to your left to deepen the twist.
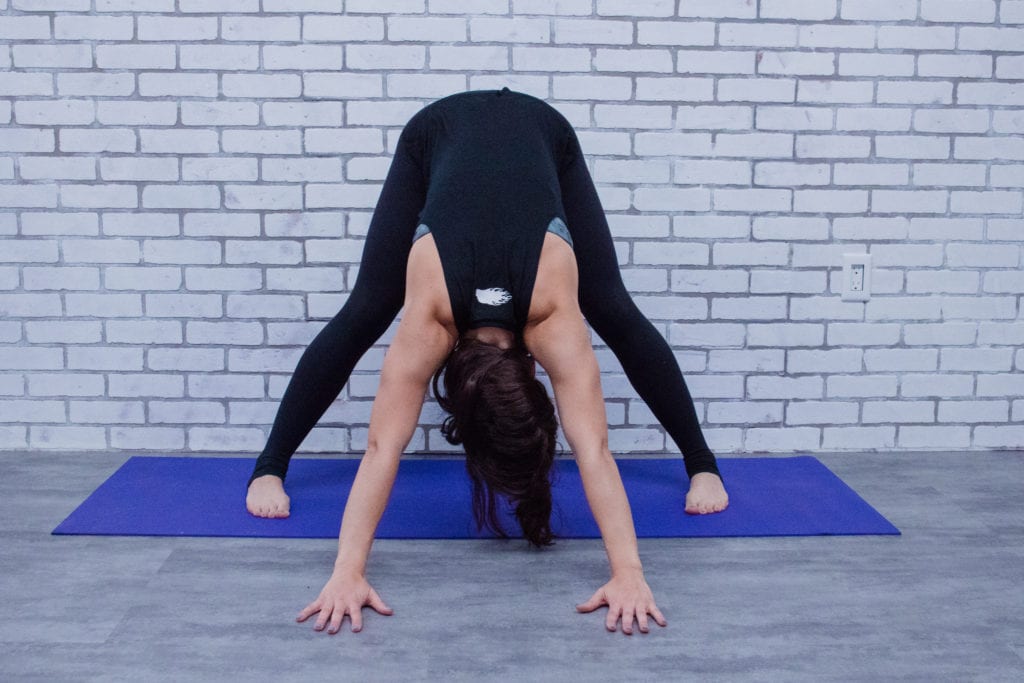
Wide Legged Forward Fold With Upper Back Extension
Muscles stretched:
Hamstrings, latissimus dorsi
How to:
Step 1
Begin by separating your feet a wide distance from each other, turning your toes slightly inward and keeping a gentle bend in your knees.
Step 2
Reach your arms overhead, creating length through your entire spine. Keep your spine straight and slowly fold forward. Find your forward fold by bending at your hip creases rather than rounding through your spine.
Step 3
Release your hands to the floor with your fingers spread wide. Bend your knees as needed in order to keep your spine perfectly straight. Allow your head and neck to relax and hang heavy.
Step 4
Walk your arms forward, extending your arms completely straight while firmly pressing your body weight back into your heels. Spread your fingers wide and press them deeply into the floor. Feel like you are pulling the floor toward you, with your palms helping to sink your chest closer to the floor, and engage a deep latissimus dorsi stretch.
Step 5
Hold for 1 minute.
Benefits:
- Helps prevent injury
- Alleviates lower back pain
- Improves lower body strength
Chelsea Morrow is a certified personal trainer and yoga instructor. After a six-year career as a professional figure skater, she now works at Burn Boot Camp HQ on the Marketing team and is passionate about educating all of Burn Nation about fitness, nutrition, and a positive mindset. Chelsea is also the author and mastermind behind The Blueprint, Burn Boot Camp’s weekly newsletter. She loves doing yoga, meditating, rock climbing, her dog Yogi, and eating Mexican food.
